How to set custom HTML in Filelink of typo3
First you have to install “css_filelinks” extensions.
Then after you have to enable configuration from this extension. you have to check below two configuration.
  => Don't insert _CSS_DEFAULT_STYLE [dont_default_css]
  => Allow the "Read from path" field [allow_read_from_path]
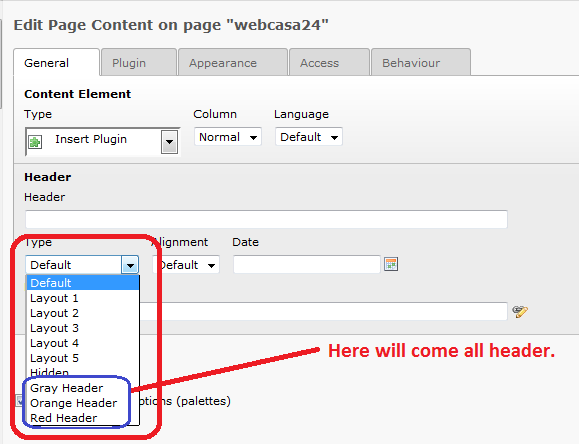
You can check configuration in below image

Filelink Extension, css_filelinks
Integrate your plugin and you can insert your media files. like : image, pdf, excel, csv, powerpoint, dco files.
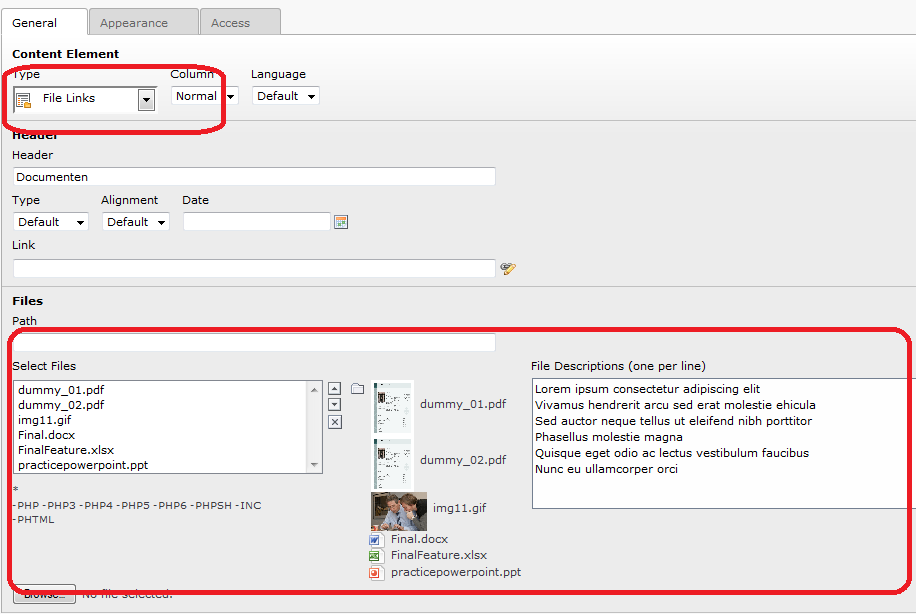
Filelink Extension, css_filelinks
If you want to wrap this element with your HTML then you can use below typoscript for that.
********************************************************
*For File Links Layout
*******************************************************
additionalClass{
        image=bmp,gif,ico,jpg,png,tiff
        video=wmv,avi,asf,mpg,mp4
        audio=mp3,wav,mid
}

tt_content.uploads.20.layout.file >
tt_content.uploads.20.layout.file.cObject=COA
tt_content.uploads.20.layout.file.cObject{
  wrap=<div class="row"> | </div>
  10 = TEXT
  10.wrap=<span> | </span>
   10.value= <div class="titel">###DESCRIPTION###</div><div class="type"><a target="_blank" href="###URL###"><img alt="img" src="fileadmin/images/###FILEEXT###.png"></a></div><div class="download"><a target="_blank" href="###URL###"><img alt="img" src="fileadmin/images/download_icon.png"></a>  </div><a target="_blank" href="###URL###"></a>
}

tt_content.uploads.20.layout{
  global=<div class="documenten"><div class="row"><div class="titel"><strong>Titel</strong></div><div class="type"><strong>Type</strong></div><div class="download"><strong>Download</strong></div></div>###FILE###</div>
}
For more info regarding this extension you can visit here
It will look like below image.

Filelink Extension, css_filelinks
*Note : You have to set css for that and also you can set your own icon.
If you have any queries, please do not hesitate to contact me at Jainish Senjaliya